Record a talk
Record your slides and voice from the presenter view, with an optional camera picture. TalkWeaver saves the slides, the voice and the camera as separate layers, and keeps a Run: the record of that one delivery of your talk.
Start a recording
- Open your talk in the presenter view.
- In the recording controls, choose Slides and voice to record the slides and your voice, or Slides, voice and camera to record the camera as well.
- Choose your microphone with Microphone. You can also set it in Settings › Recording › Microphone. TalkWeaver remembers the choice on this Mac.
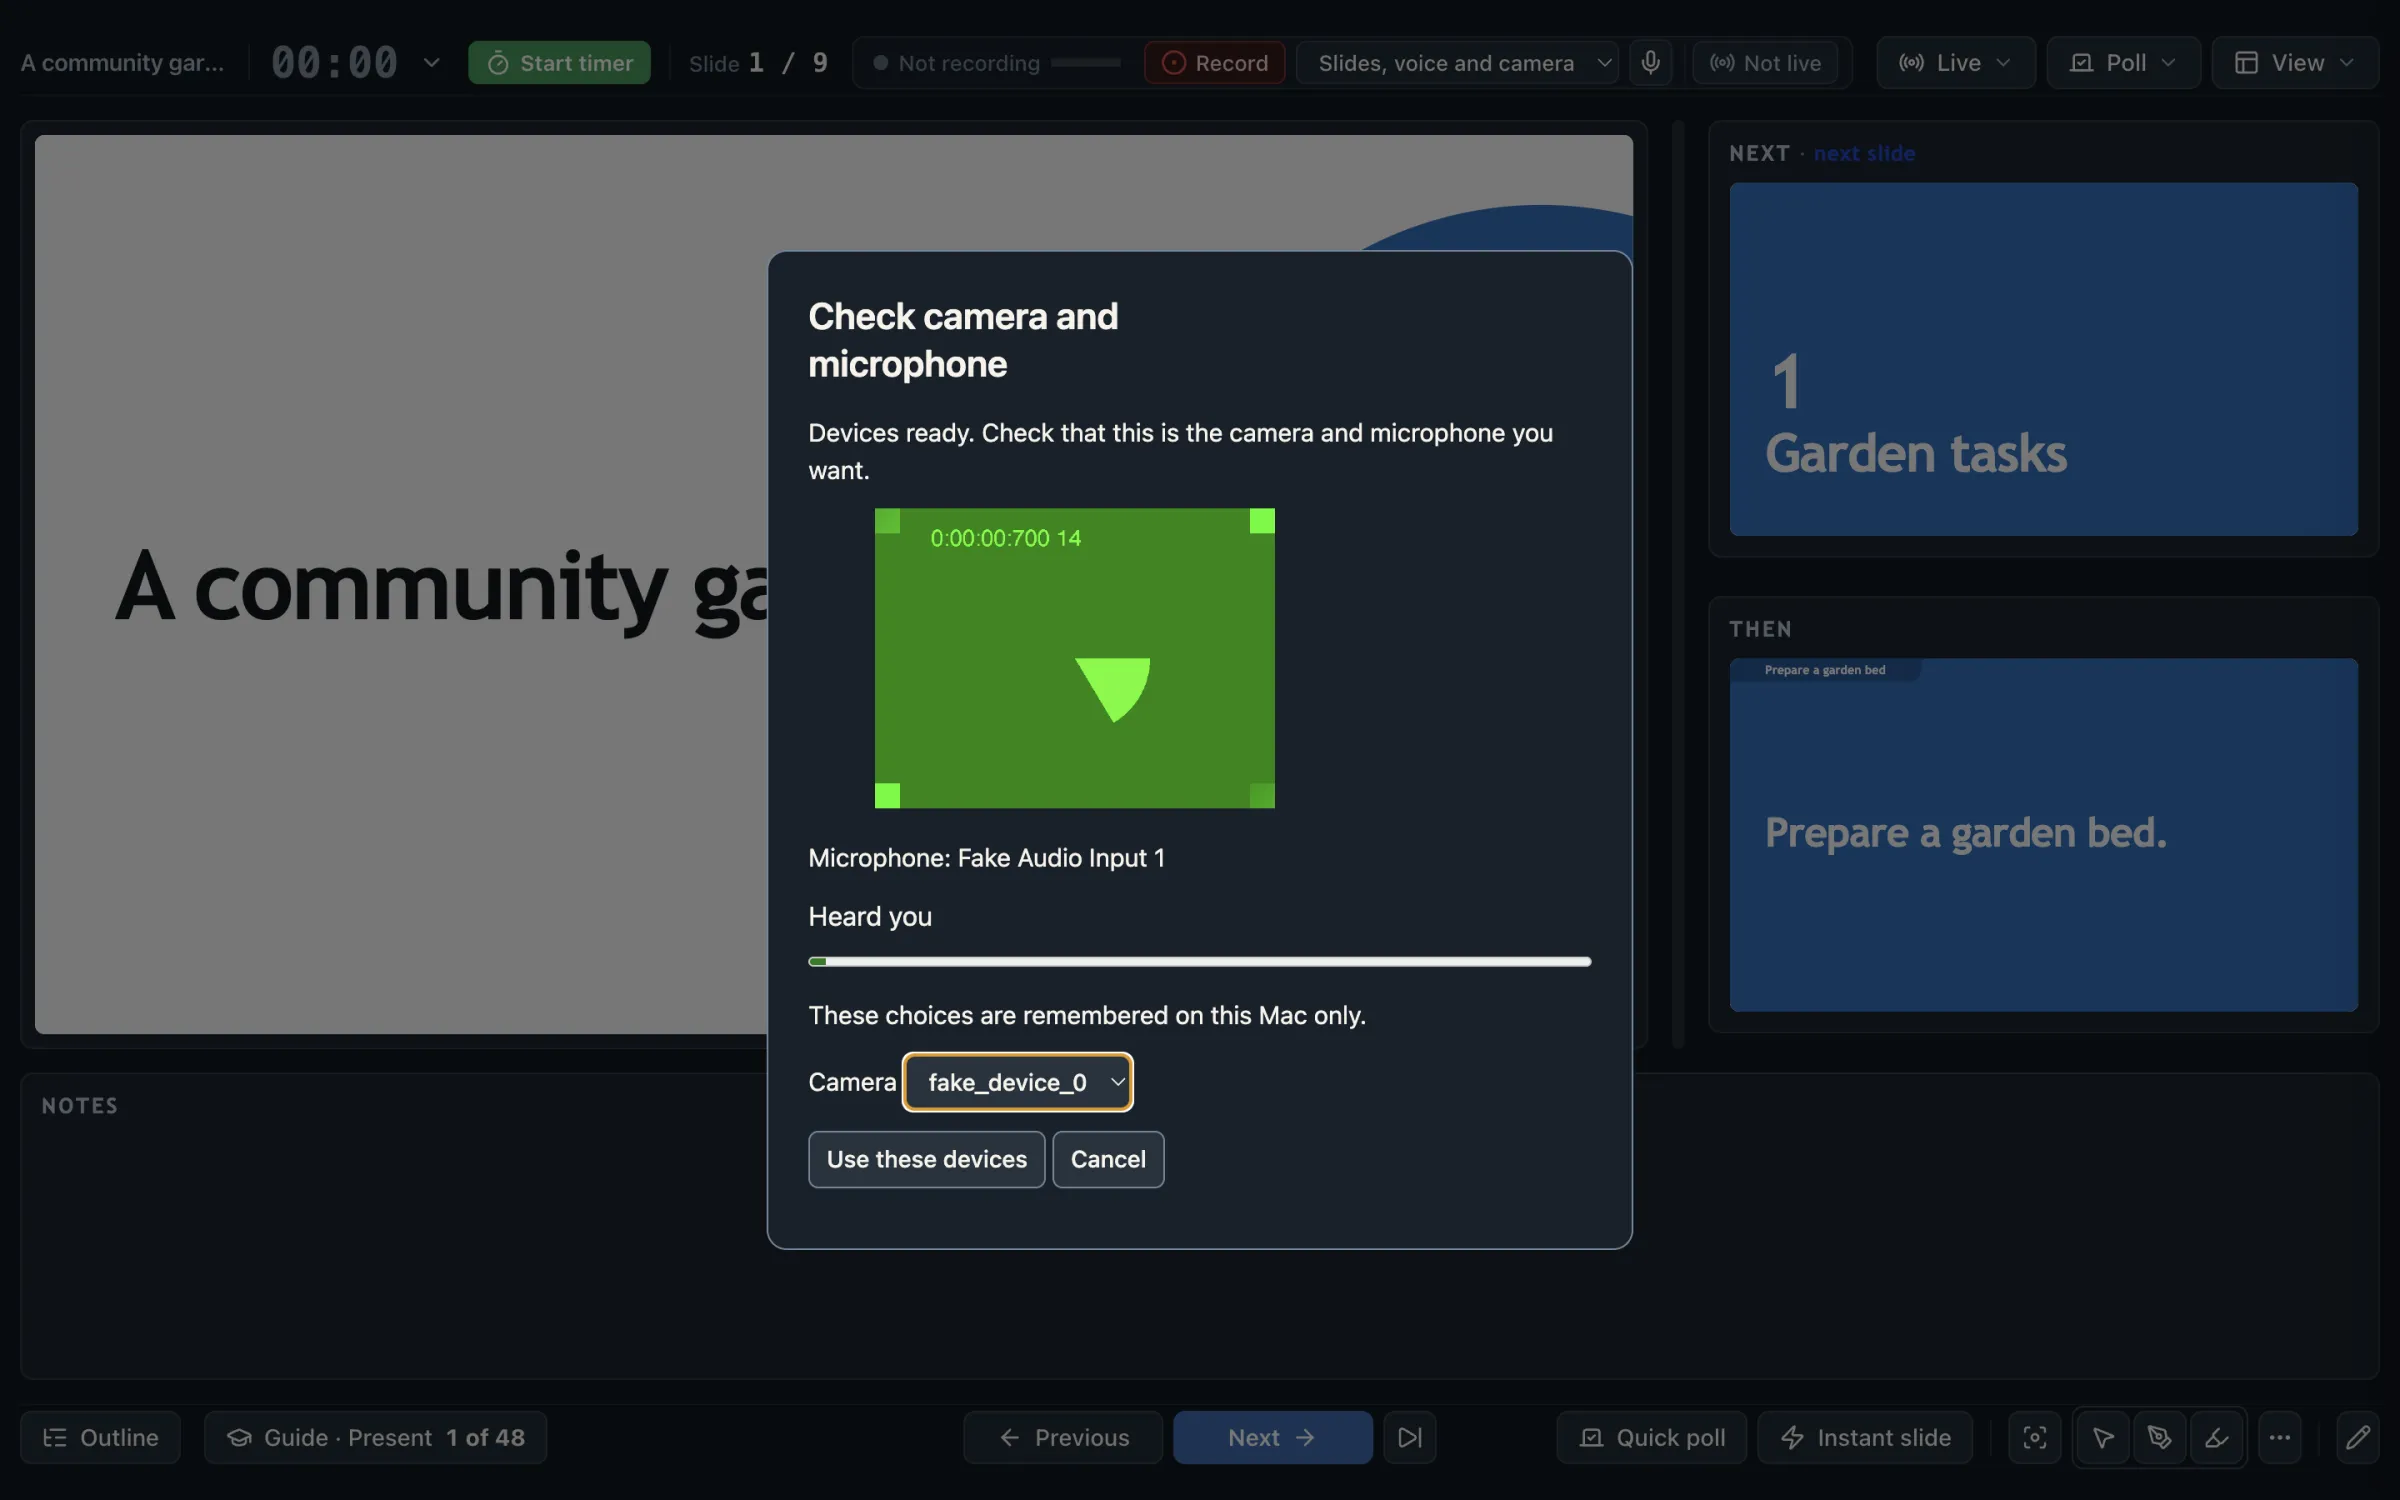
- Choose Record, or press ⇧R. The first time you record, and after you change the microphone or camera, the Check camera and microphone dialogue opens. At other times the countdown starts at once.
- If the dialogue opens, check the microphone name and level. If you chose a camera, check its preview and select the camera you want. Then choose Use these devices.
- A countdown shows 3, 2, 1 on a dark disc in the middle of the presenter view, then recording starts. The countdown is not recorded.
- Present your talk as usual.
The level and name of the microphone beside Record show while the microphone preview is on.


What the layers contain
Each layer is a separate recording. The slides layer records the talk’s slides only, not your desktop or any other application. The voice layer records the microphone you chose. The camera layer, if you chose a camera, records that camera as its own layer, so you can leave its picture out of the finished video.
Pause, stop and save
While recording, choose Pause recording to pause and Resume recording to continue. To throw away the recording in progress and begin again, choose Start again, the circular arrow at the end of the recording controls, then Discard and start again; Runs you saved earlier are kept. Hold the pointer over any control to see its name. On a narrow screen, Start again and Microphone may leave the bar while you record; the presenter’s command palette still has Start again… and Choose microphone… under Recording.
- When you finish, choose Stop and save recording.
- If the recording is shorter than 20 seconds, TalkWeaver asks Short recording — keep it? Choose Keep to save it or Discard to delete it. You can change the length in Settings › Recording › Advanced recording settings, under Discard runs shorter than.
- To edit the recording now, choose Edit video on the Saved to History note that appears after saving. It opens Studio on this Run.
- To edit it later, choose Tools › TalkWeaver Studio…, open the saved Run and choose Edit video.

What is saved where
A Run holds the slide changes and recording details of one delivery. The Run, its transcript and its edit file are saved in your vault. The recorded voice, slides and camera files are saved in TalkWeaver’s app-data folder, outside the vault. When you move or back up a recorded talk, keep both the vault and these recording files.
| Saved item | Location |
|---|---|
| Run record | In your vault: _PRESENTATIONS/<talk>/<Run ID>.json. |
| Voice | In TalkWeaver’s app-data folder: recordings/<Run ID>.webm. Additional segments are saved with numbered names. |
| Slides and camera | In app data: recordings/<Run ID>/, with slides.webm, optional camera.webm, and capture.json. |
| Transcript and edits | Separate files beside the Run: <Run ID>.transcript.json and <Run ID>.edits.json. |
To open the recording folder:
- Open Settings › Recording.
- Beside Recordings on this Mac, choose Show in Finder.
A Run ID looks like sess-20260706-225356-p. On macOS the app-data folder is normally ~/Library/Application Support/talk-weaver. If a Run cannot be saved to its vault, TalkWeaver can keep it in app data instead, and the message shown after saving says so.
Permissions and problems
When you use the microphone or camera, macOS may ask for access. If access is denied, allow TalkWeaver in System Settings › Privacy & Security › Microphone or Camera, then try again. The slides layer is captured inside TalkWeaver, so there is no desktop screen picker.
- If the microphone is lost, a warning explains what stopped and offers another connected microphone. The Run records the gap. Changing microphone does not recover voice that was not recorded.
- If saving fails, keep the presenter open, check disk space and try again.
- If a picture layer fails, the voice you captured is still saved.
Known limits
Recording does not capture your whole screen. When you reach the last slide, the notice Last slide. Save this run to History? stays until you save or dismiss it, also if you go back to an earlier slide. Recording has not been checked by hand on Windows.