
Edit a recording in Studio
Open a saved Run in Studio to play it, trim its start and end, cut words and pauses, move a slide change, leave a slide out, choose where your face appears, or even out the sound. A Run is the saved record of one delivery of your talk. Studio saves your edits in a separate file and applies them in playback and exports. It never changes your original recording.
Open and play a Run
A Run’s recording is stored as separate layers: the slides, your voice and, if you recorded with a camera, the camera. Studio plays the layers together.
- Open Tools › TalkWeaver Studio….
- Select the saved Run for your talk.
- Choose Play, or press Space. Press Space again to pause.
- Use the scrub bar to move to another point in the recording.
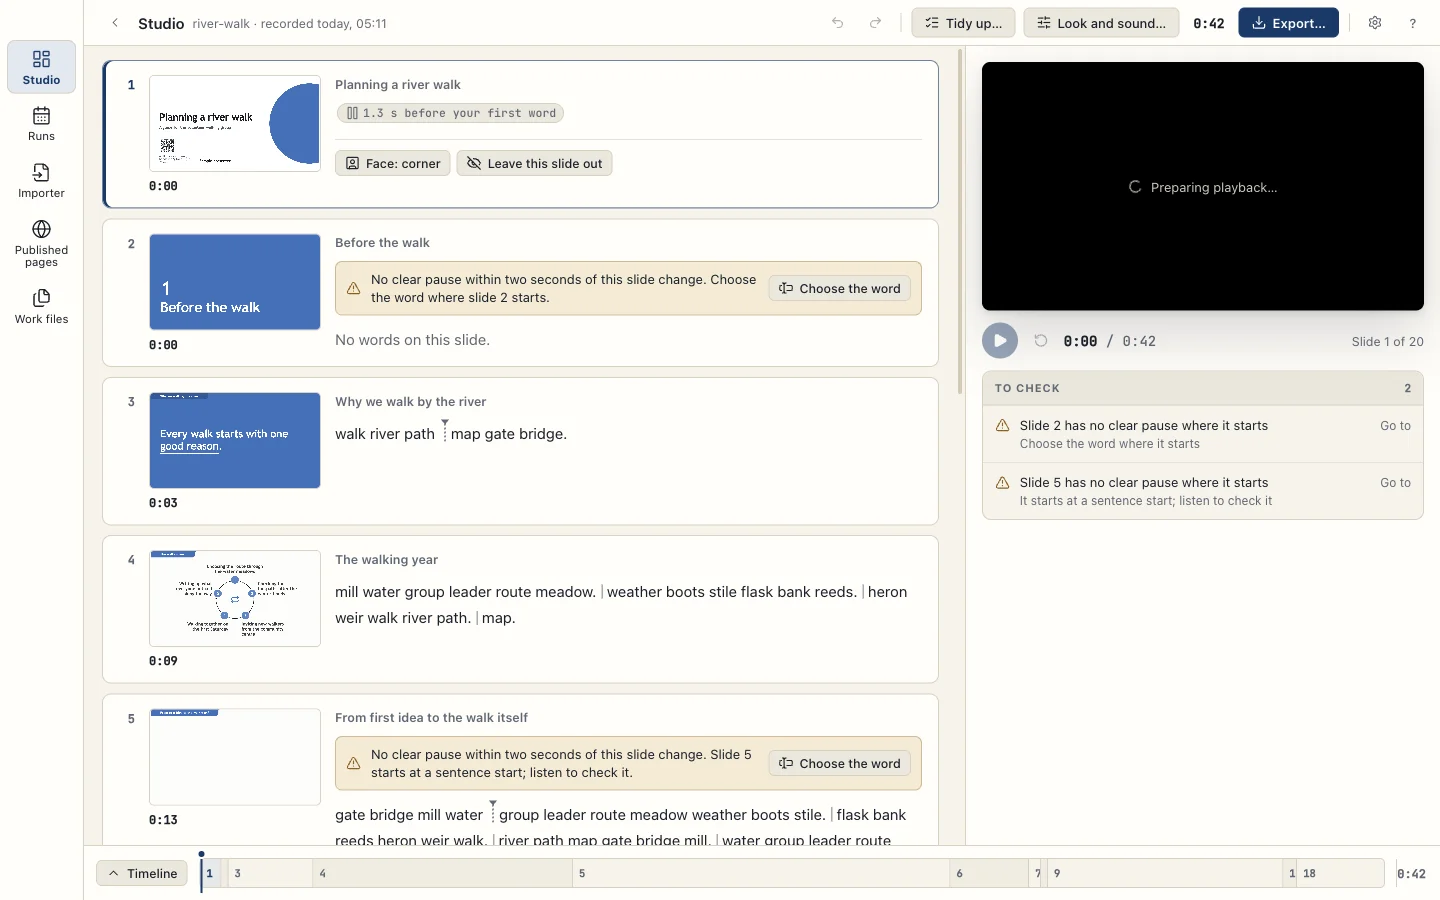
The picture follows the recorded slide changes. A slide change is the point in the recording where the talk moves from one slide to the next. A long recording can take several seconds to prepare for its first playback.
Trim the start and end
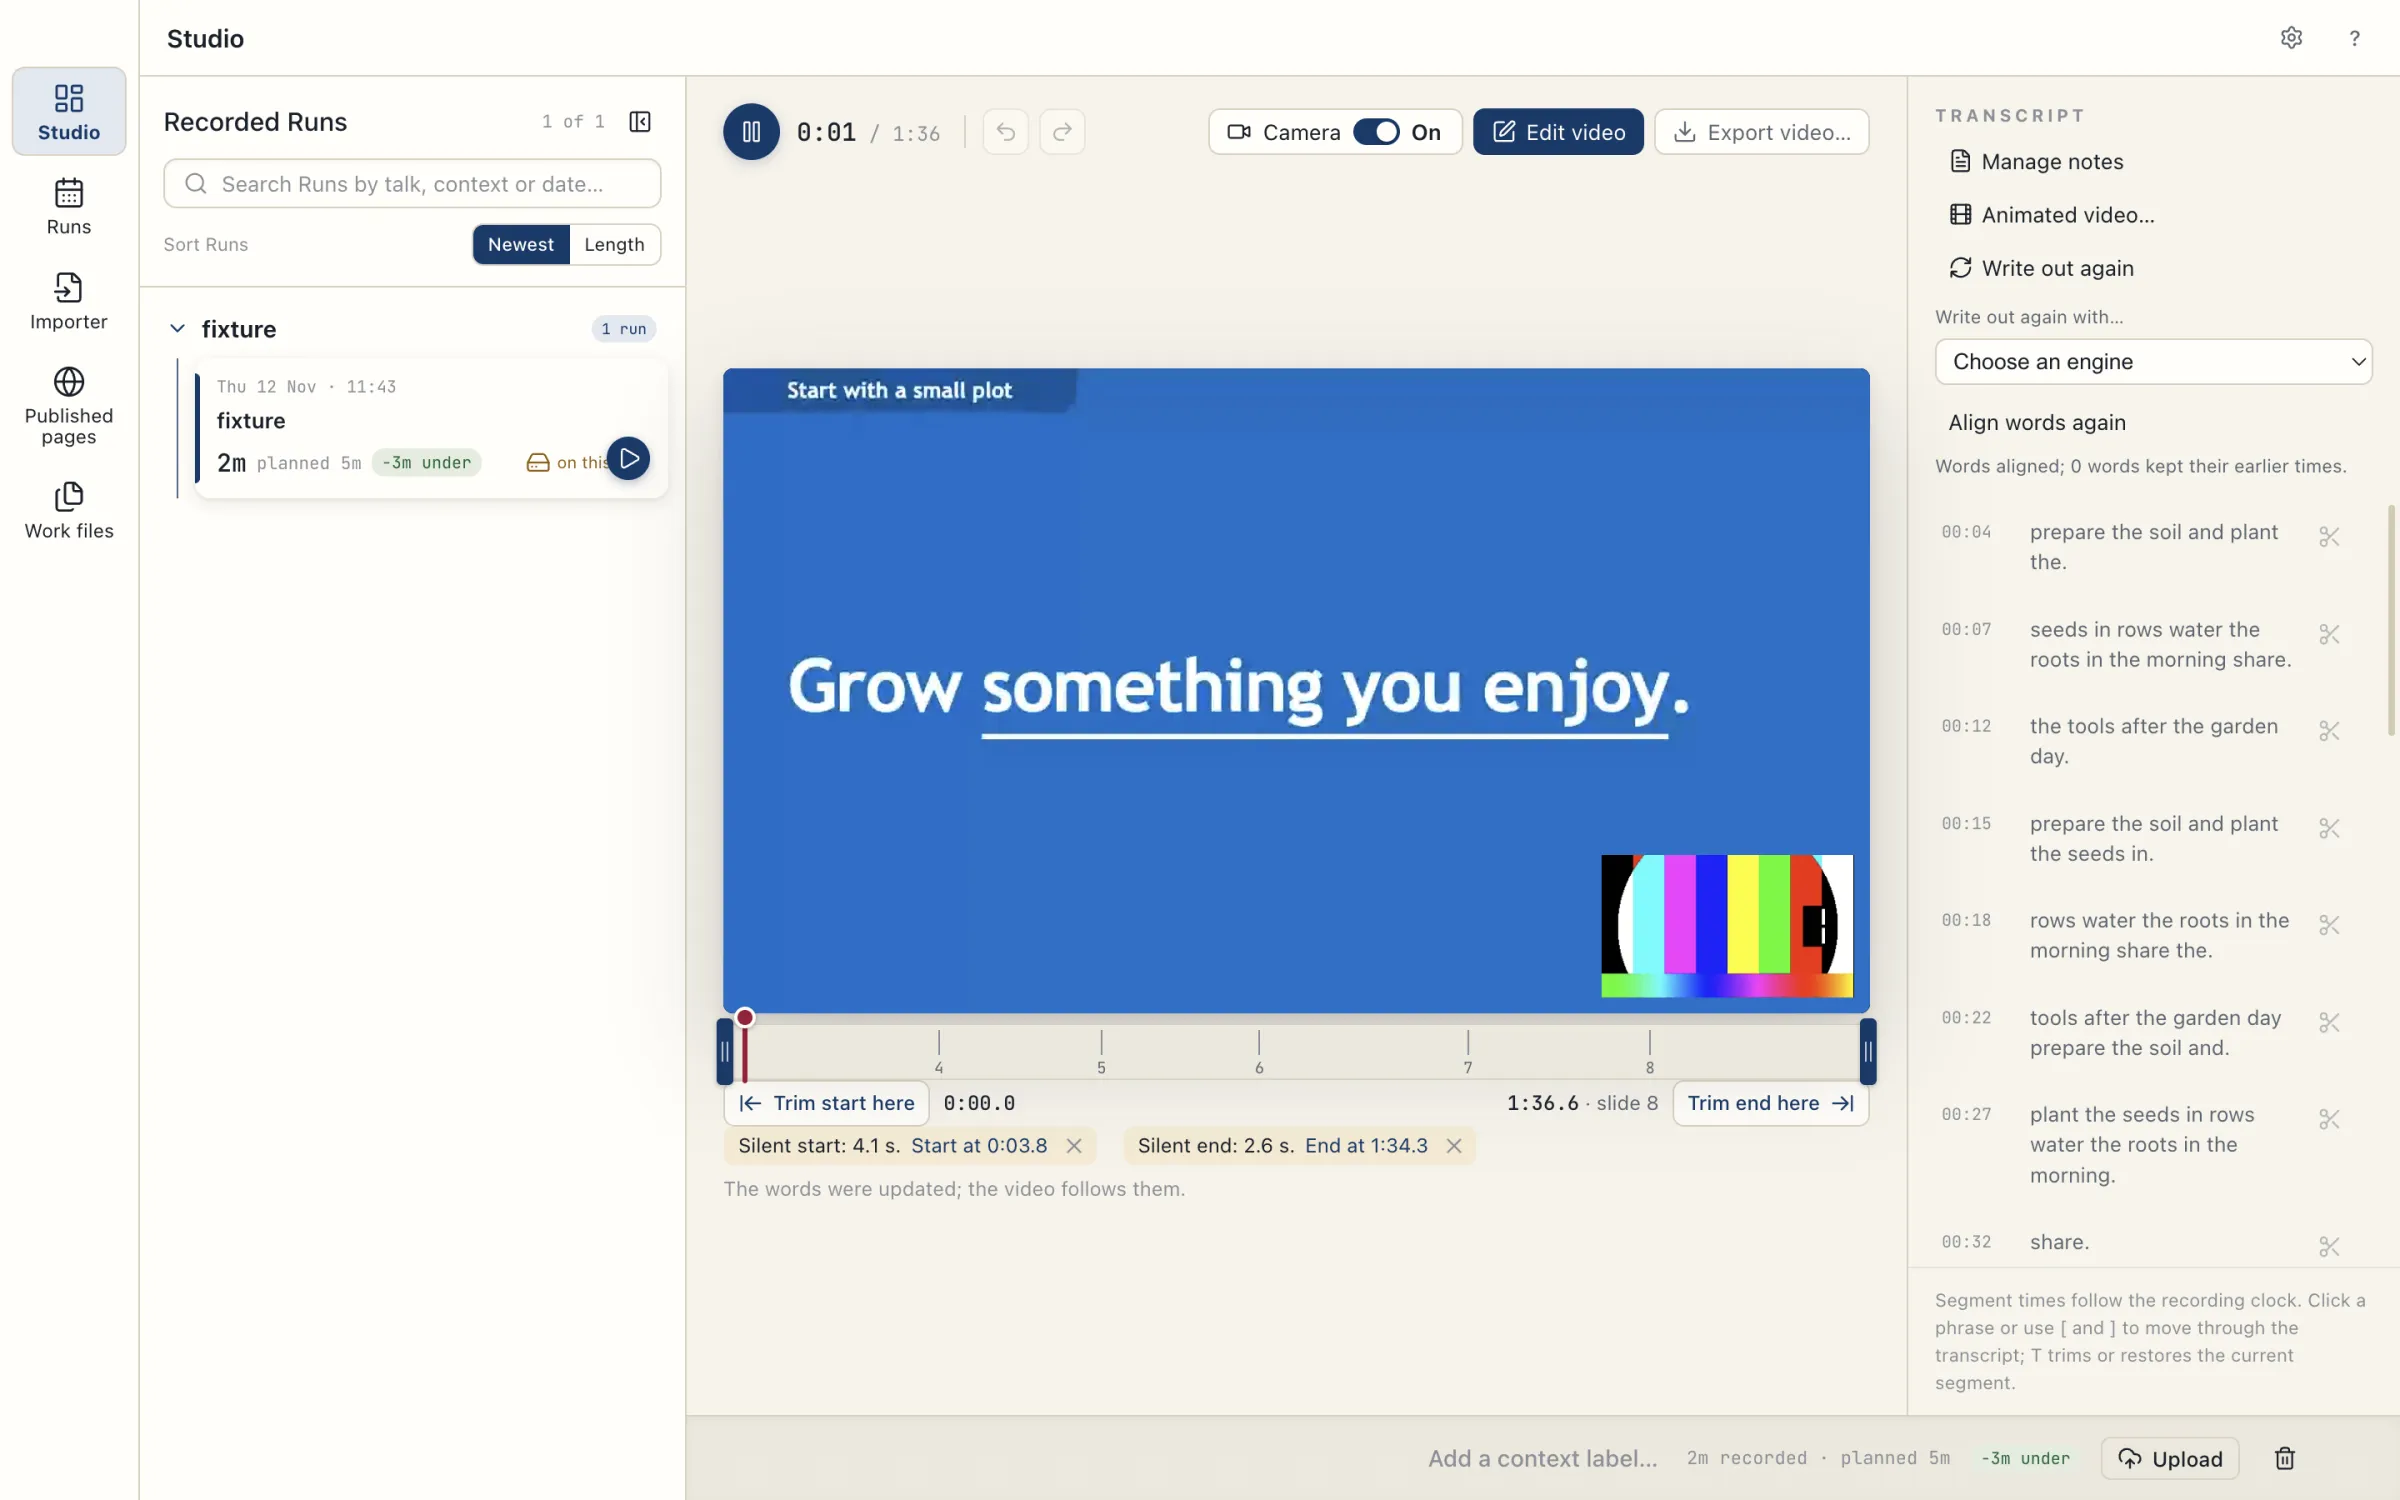
- Move the playhead to the point where the video should start.
- Choose Trim start here (I).
- Move the playhead to the point where the video should finish.
- Choose Trim end here (O).
- Play the result.
You can also drag the two trim handles under the picture. To step back or forward through your edits, choose Undo or Redo. Once something is trimmed, Use the whole recording appears. It removes the trims and every other cut, including cut words and pauses; moved slide changes and left-out slides stay.
Cut words and pauses
Cut words
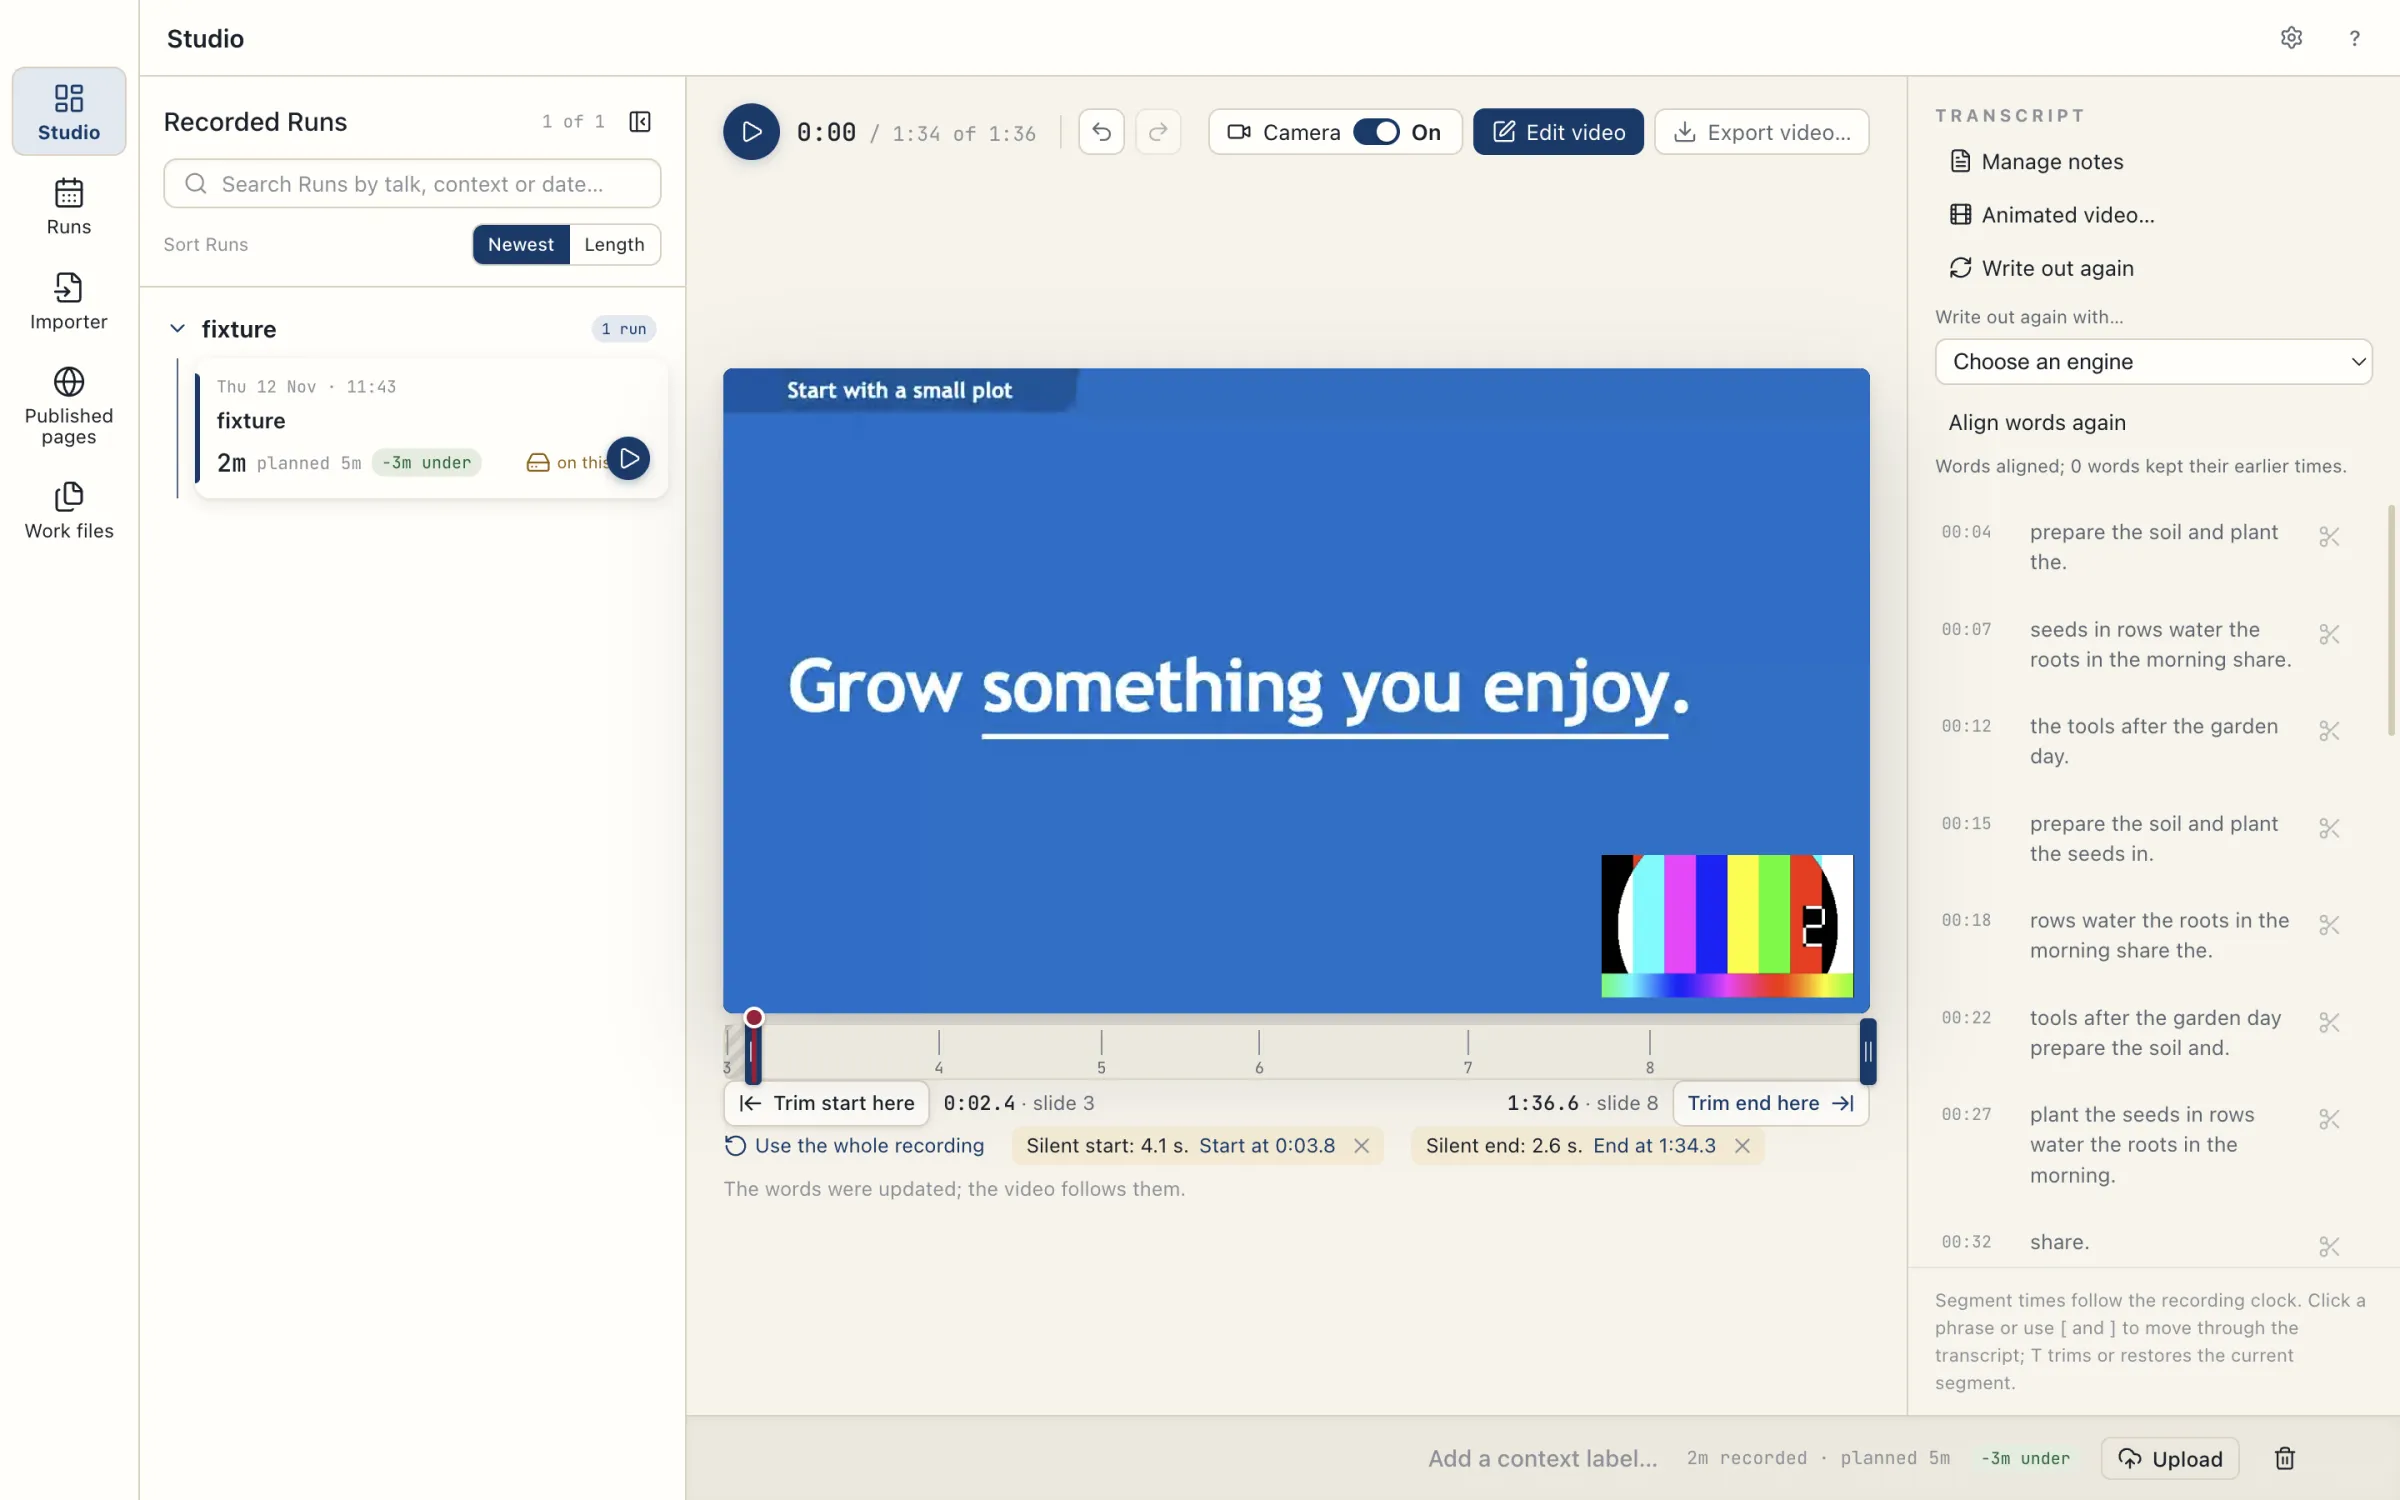
- Choose Edit video. The transcript appears beside the player, grouped by slide.
- Drag across the words you want to remove.
- Listen to the selection.
- Choose Cut, or press Backspace. The cut removes that stretch from the picture and the sound together.
Cut a pause
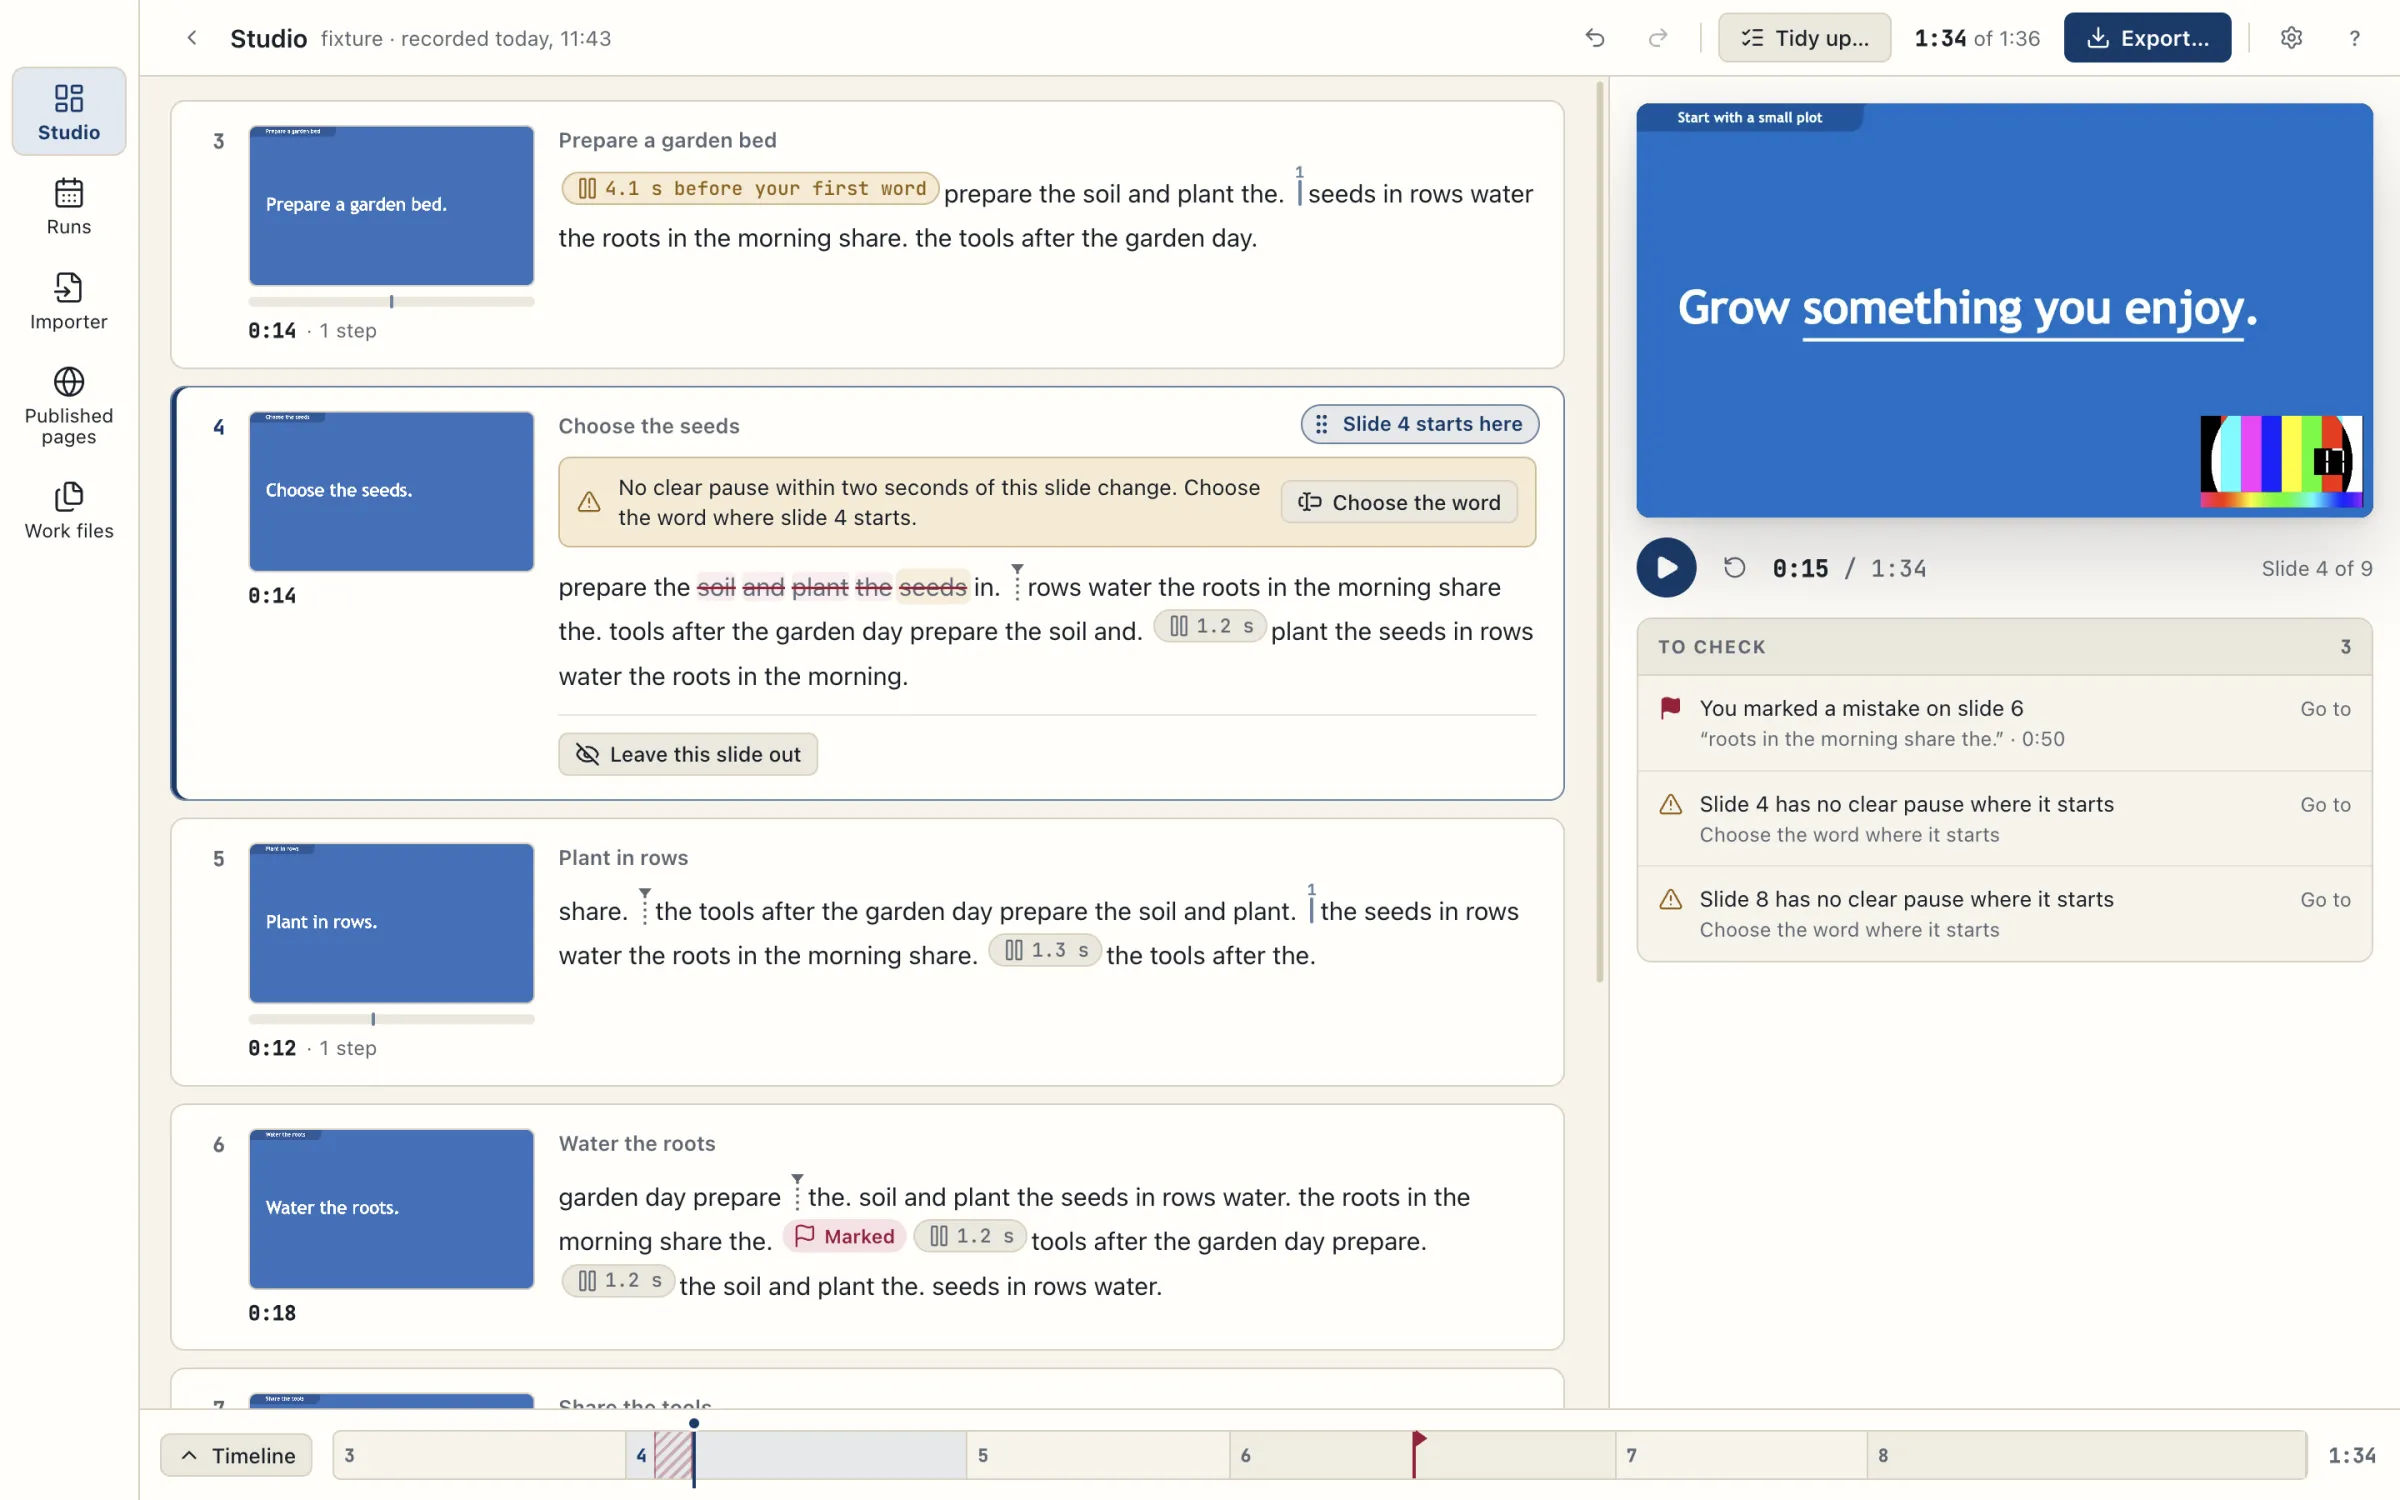
A pause cannot be selected on its own. Tidy up… offers to shorten long pauses; the steps are below. A selection of words that spans a pause removes the pause together with the words.
Play across the join to hear the result. To restore a pause you have cut, click it in the transcript and choose Put back.
Without precise word timing, cuts snap to clear pauses. If a selection needs more words, the editor says so; follow its message. Transcription and word timing explains precise word timing.
Review suggested cuts with Tidy up
- Choose Tidy up…. TalkWeaver lists suggested cuts.
- Review the ticked proposals.
- Listen to anything marked Needs a listen.
- Choose Cut the … ticked.
Nothing changes until you choose Cut the … ticked. Tidy up proposes cuts for points you marked while recording, words said twice, silence at the start and end, and pauses longer than 1.5 seconds, which it shortens to half a second. It does not propose cutting um and er, because the transcript does not mark them.
Move a slide change or leave a slide out
Move a slide change
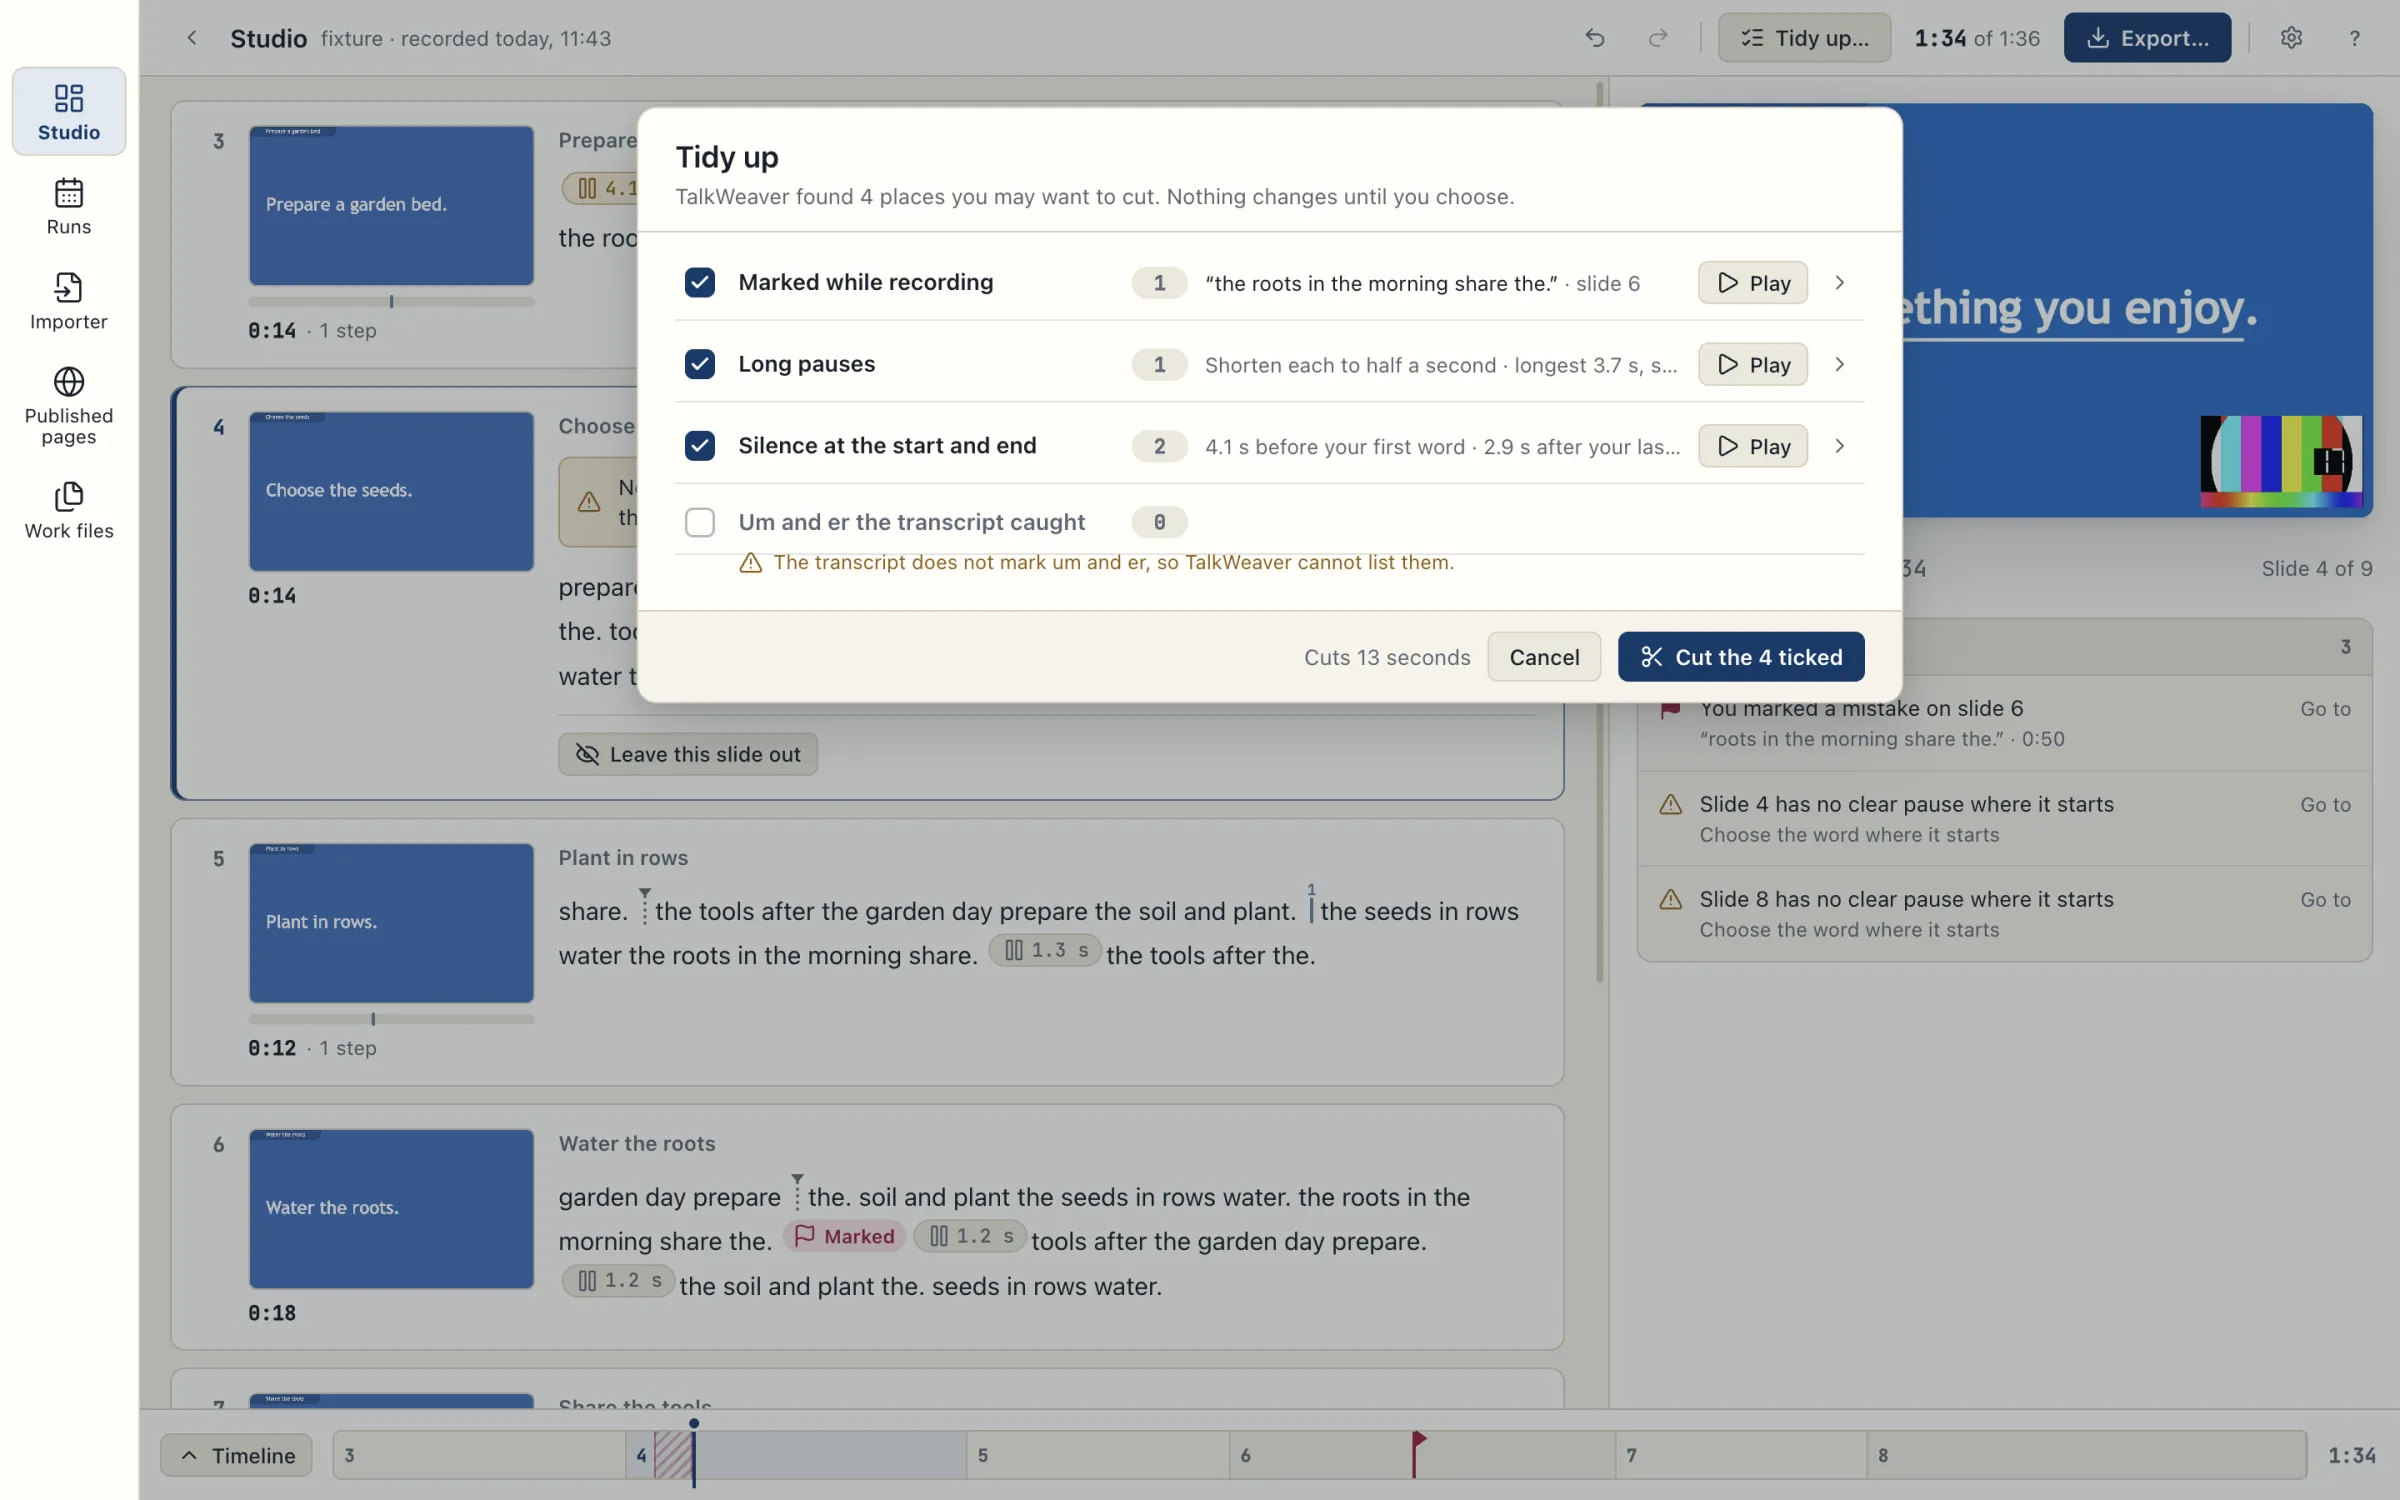
- Find the slide’s heading in the transcript.
- Drag the handle beside the heading to the word where the slide should start.
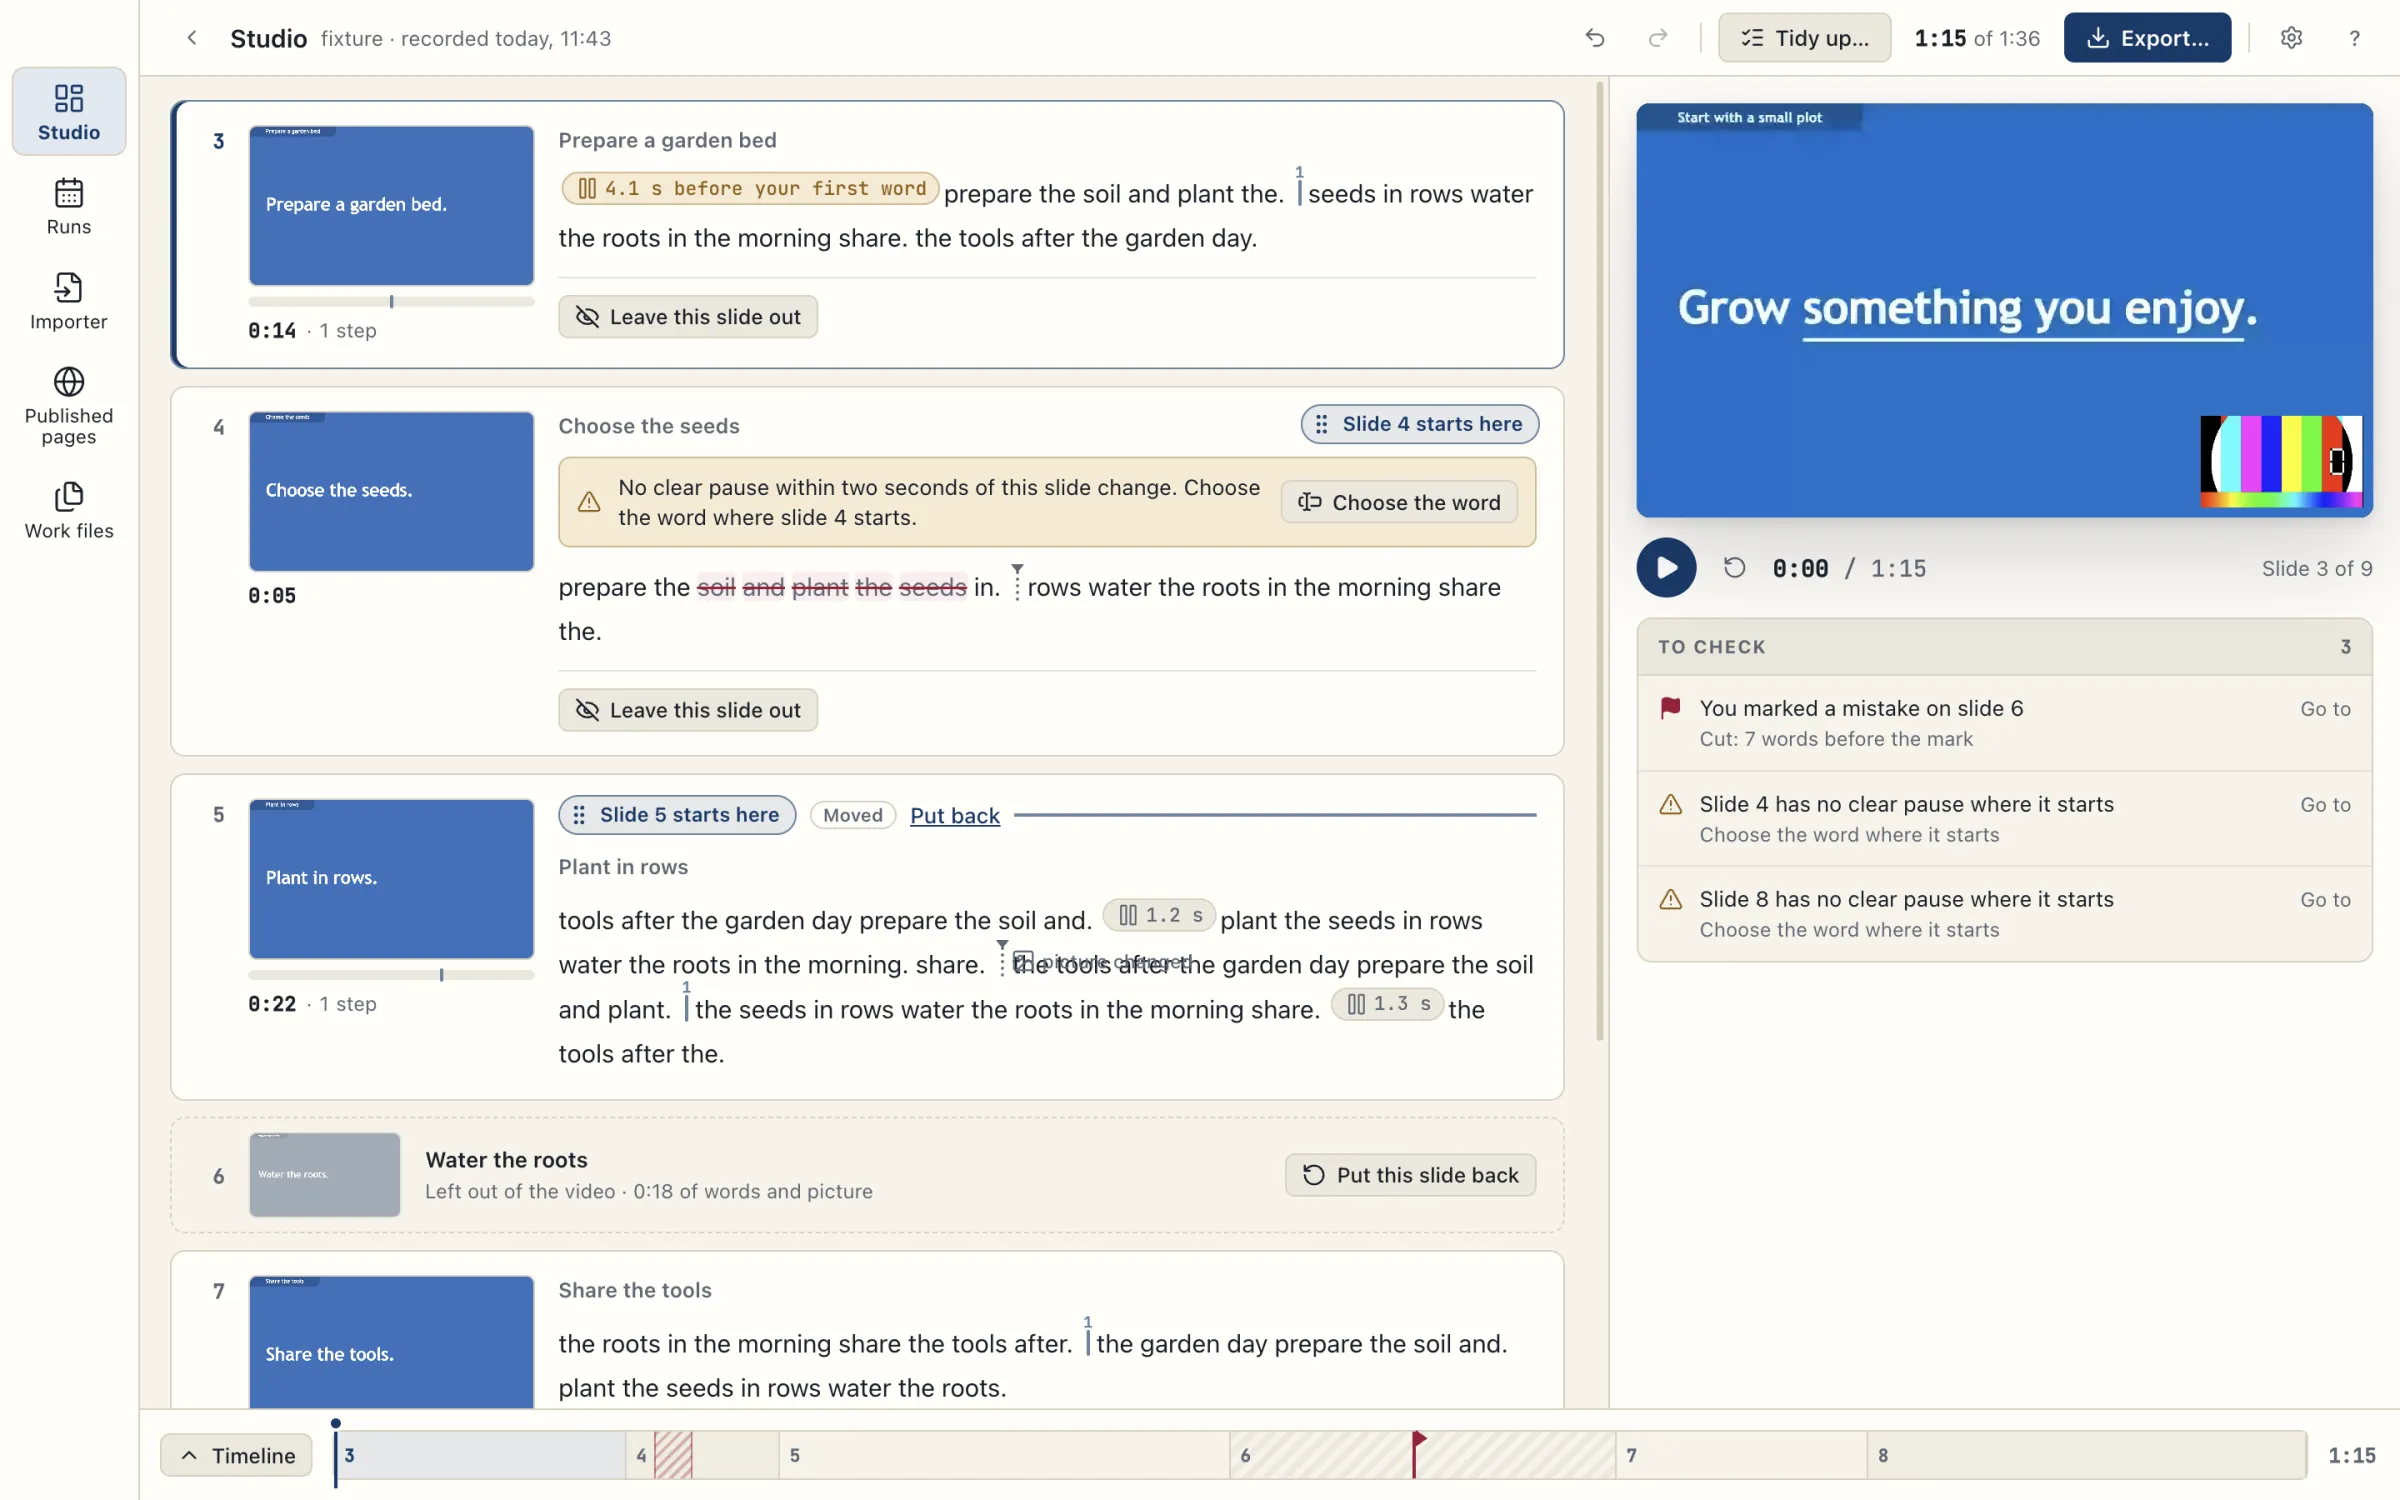
The handle snaps to clear pauses and to sentence starts. Hold Option to choose any word instead. A thin grey line before a word marks where a sentence starts. While you drag, the label says where the handle will land: after a pause, at a sentence start or on a word. A sentence start with no pause before it reads at a sentence start · needs a listen: play across it before you export.

Sentence starts come from the transcript. Some older transcripts have none; their handle snaps to clear pauses only.
If no clear pause is within two seconds of a slide change, the slide row says No clear pause within two seconds of this slide change. If a sentence starts nearby, the row quotes its first words; choose Start at the sentence to start the slide there. Otherwise, move it this way:
- Choose Choose the word.
- Click the word where the slide should start.
To check lists any slide left out whose start falls at a sentence start rather than a pause, so that you can listen to that join.
Choose Put back to restore a moved slide change.
Leave a slide out
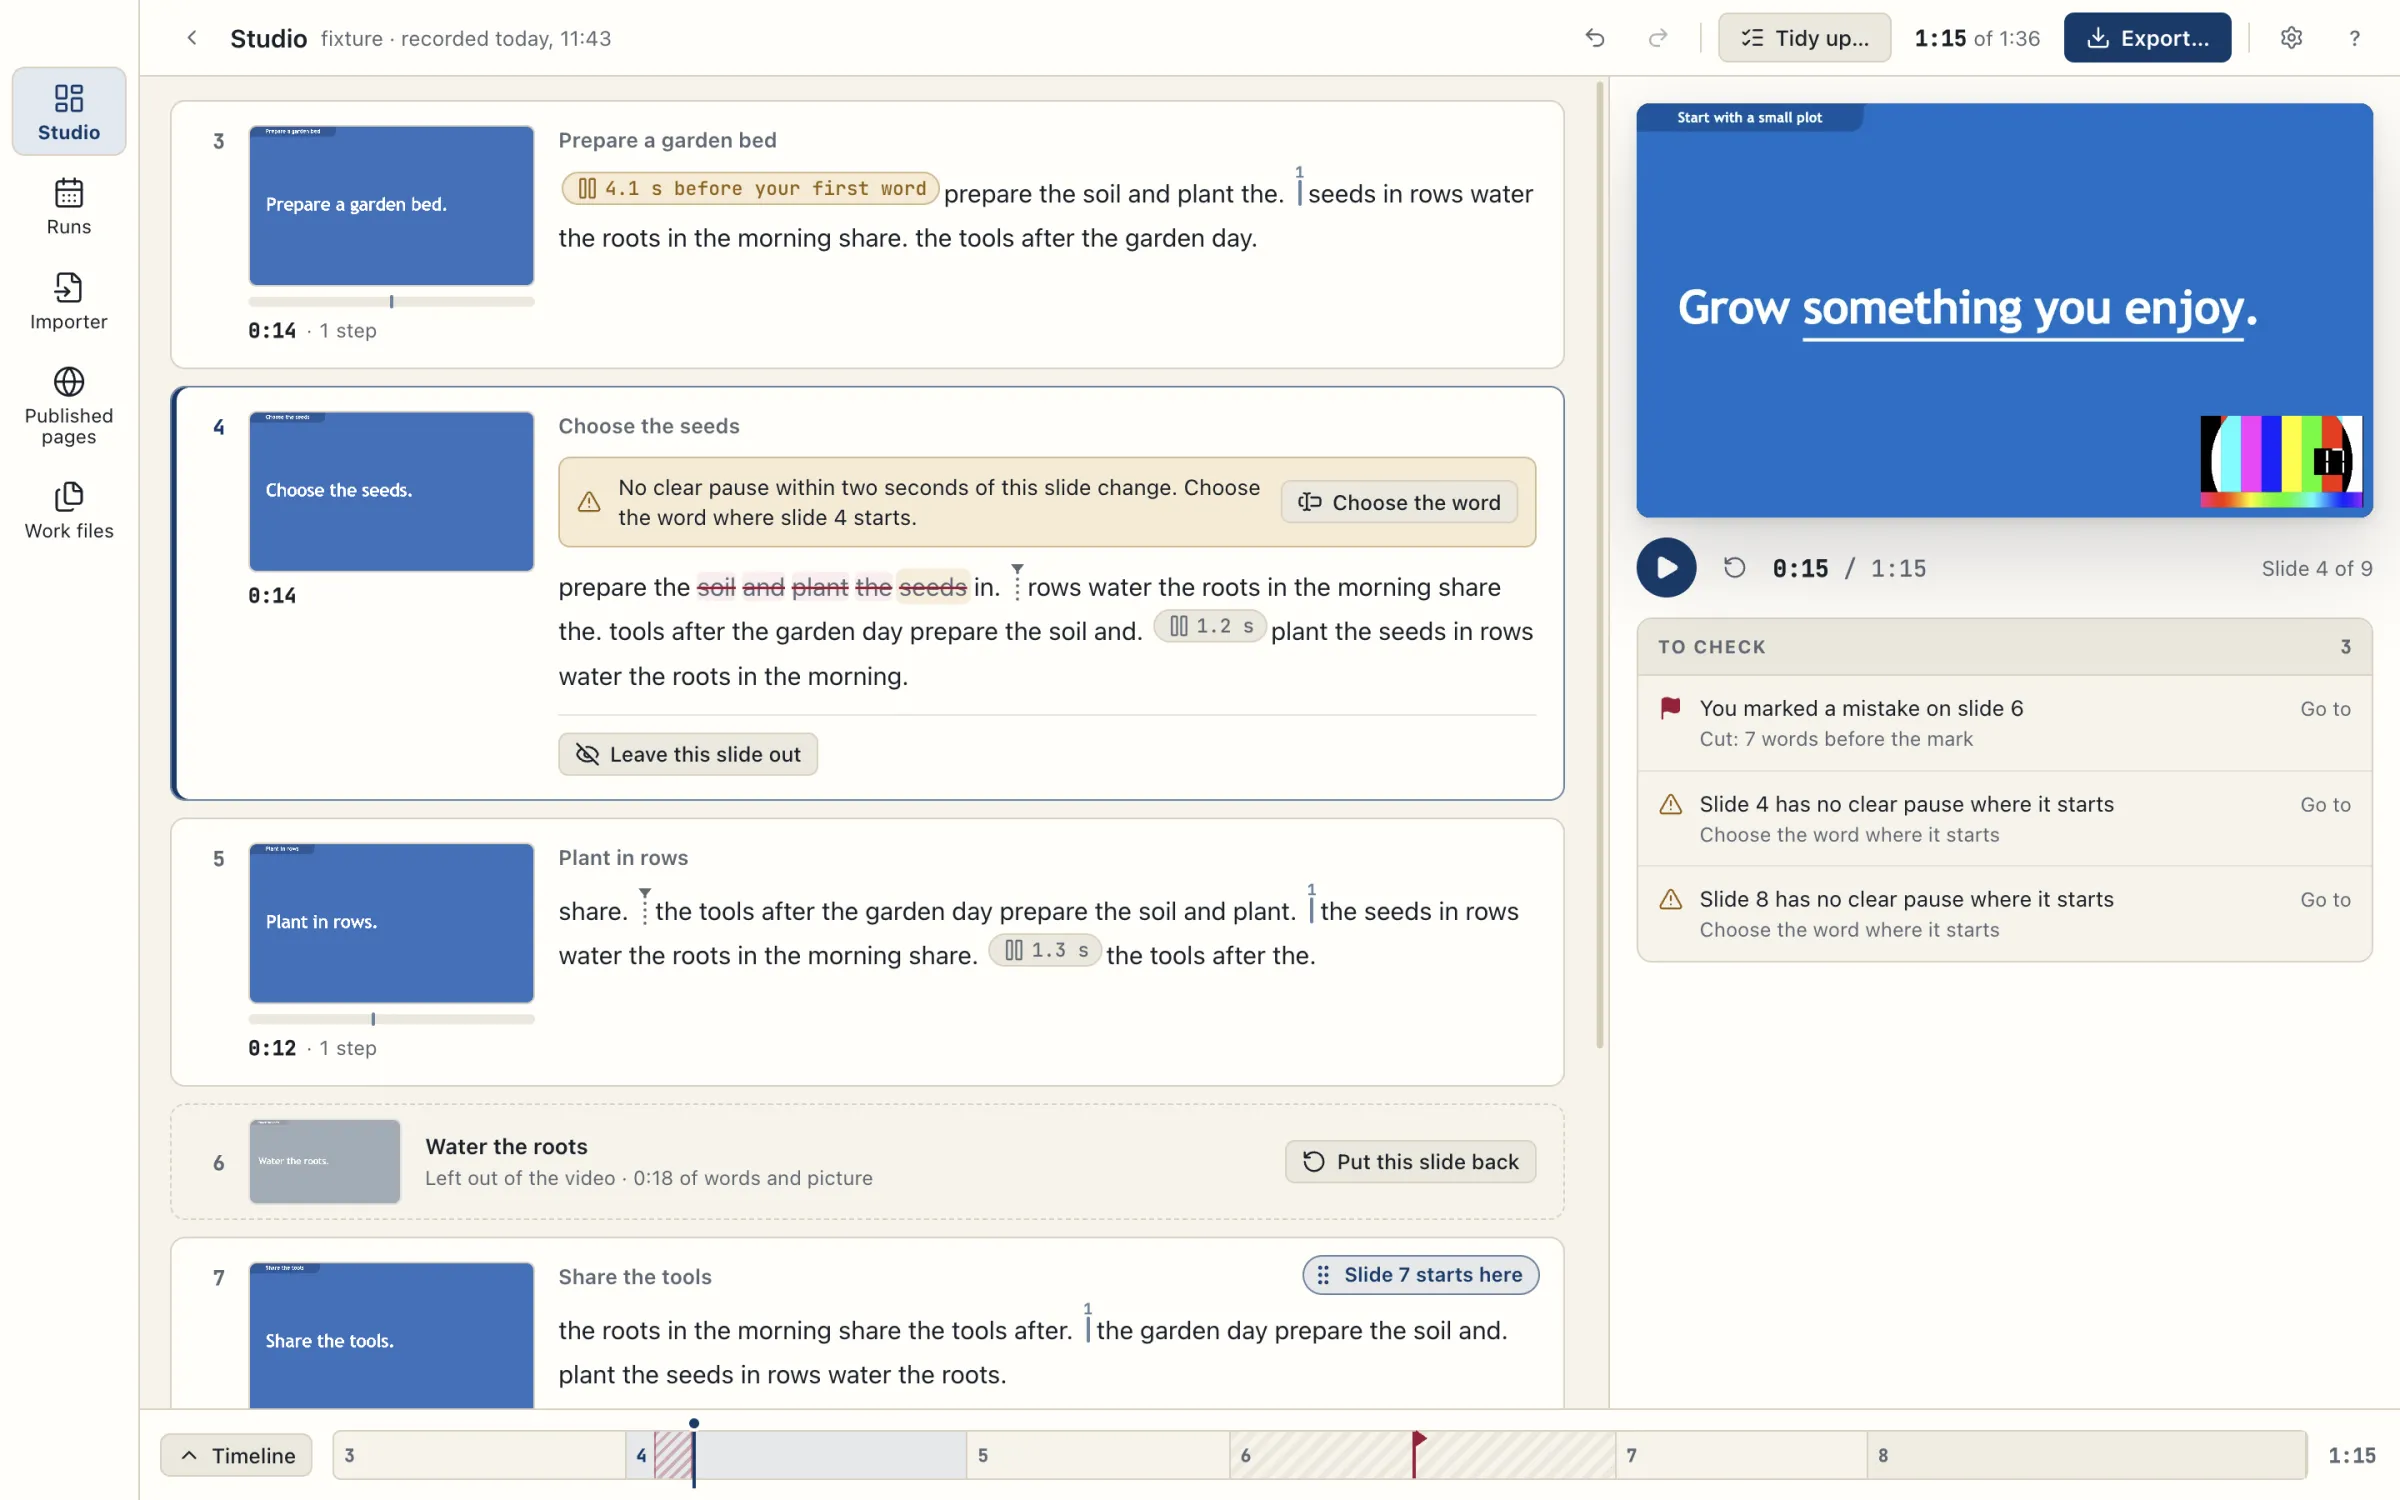
- Choose Leave this slide out. This removes that slide’s interval of words and picture from the video.
- To bring it back, choose Put this slide back.
Leaving a slide out does not remove the slide from your talk outline.
Choose where your face appears
Each slide row has a button that names the slide’s face position, such as Face: corner. It shows on the current row and on the row under the pointer. If the Run has no camera layer, the sheet says the video shows the slides only.
- Choose Face: corner on the slide’s row. The sheet Slide n: where your face appears opens.
- Choose a layout: In the corner, Side by side, Face only or Slide only.
- For In the corner, choose the Corner (Bottom right or Bottom left) and the Size (Small, Medium or Large).
- Under Use for, choose This slide, a run of slides from this one to a later slide, or The whole video.
- Choose Done.
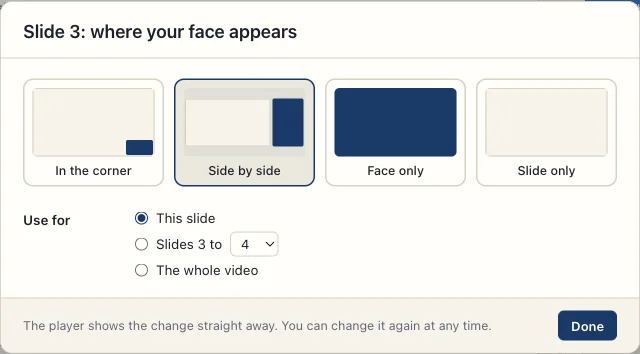
The player shows each change straight away, and the export follows it. Each change is one step of Undo. Until you choose otherwise, the face is in the bottom-right corner at medium size. Only the bottom corners are offered, so the face does not cover a slide title. The Camera switch in the player still leaves the face out of the whole video; your choices are kept for when it is on again.
Even out the volume and smooth the joins
Choose Look and sound… in the editor bar. These choices apply to the whole video and can be changed at any time.
- Smooth each join with a quick fade, so your face does not jump fades the sound and the picture briefly at each cut.
- Even out the volume brings quiet and loud parts to one level, as for a podcast.
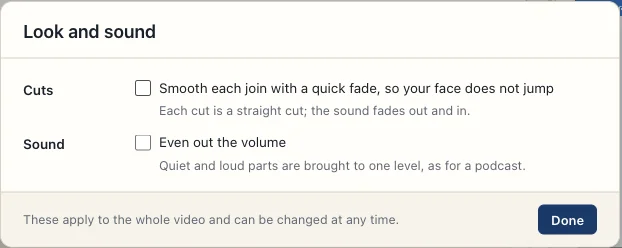
Both are on to begin with. Untick either to turn it off, then choose Done. The first time the player uses the evened sound, it says Evening out the volume for the player… while it prepares it. The export makes the joins slightly smoother than the player does.
Your original recording is kept
Studio saves every edit in a separate file, <Run ID>.edits.json, beside the Run record. The file also holds the undo and redo history, so your edits and that history are still there when you reopen Studio.
Studio never changes the recorded media files (the slides, voice and camera layers). Cuts, trims, moved slide changes, left-out slides, face positions and the Look and sound… choices go into the edits file and affect only playback and exports. Record a talk lists where each of these files is saved.
On a Mac, ⌘Z undoes an edit and ⇧⌘Z redoes it. On Windows, use Ctrl+Z and Ctrl+Shift+Z.
If the same vault is open on more than one Mac, install the same TalkWeaver version on each before you edit a recording. An older version cannot read edits made by a newer one: it shows The saved edits for this recording were made by a newer version of TalkWeaver. It is kept unchanged. with Start new edits, which sets those edits aside in a separate file and starts with none.
Known limits
- If a Run has no words written out, you can still leave slides out and export, but you cannot select words.
- If a recorded file is missing or unreadable, Studio names it and plays the layers that remain.
- If an edit cannot be saved, TalkWeaver reports it and does not export the result.
- You cannot mark a sentence break by hand.
- Edit a recording on one Mac at a time. If two Macs save an edit to the same recording at once through a sync service, one of the edits is lost.